Recently, there has been an increasing frequency of Kotlin usage, prompting me to do a simple reorganization of my Kotlin code in recent years. While reviewing my work, I stumbled upon a project that I completed five years ago using Kotlin(Bezier Curve), Out of interest, I decided to use Kotlin and Compose to re-implement the project. This also gives me a chance to reflect on what I have learned in Kotlin over these years.
Regarding Bézier curves, we won’t go into too much detail here. Simply put, for each line segment, a certain point’s proportion to its two endpoints is consistent. Bézier curves are a collection of line segments (points) during this process with the mid-segment of each line segment located at the same position.
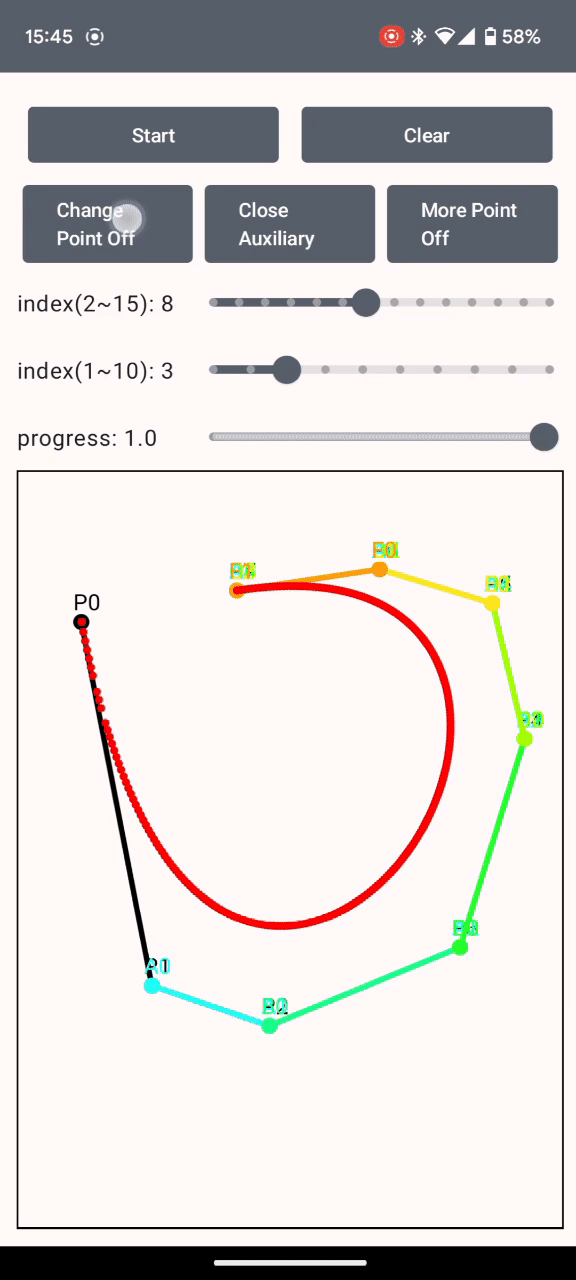
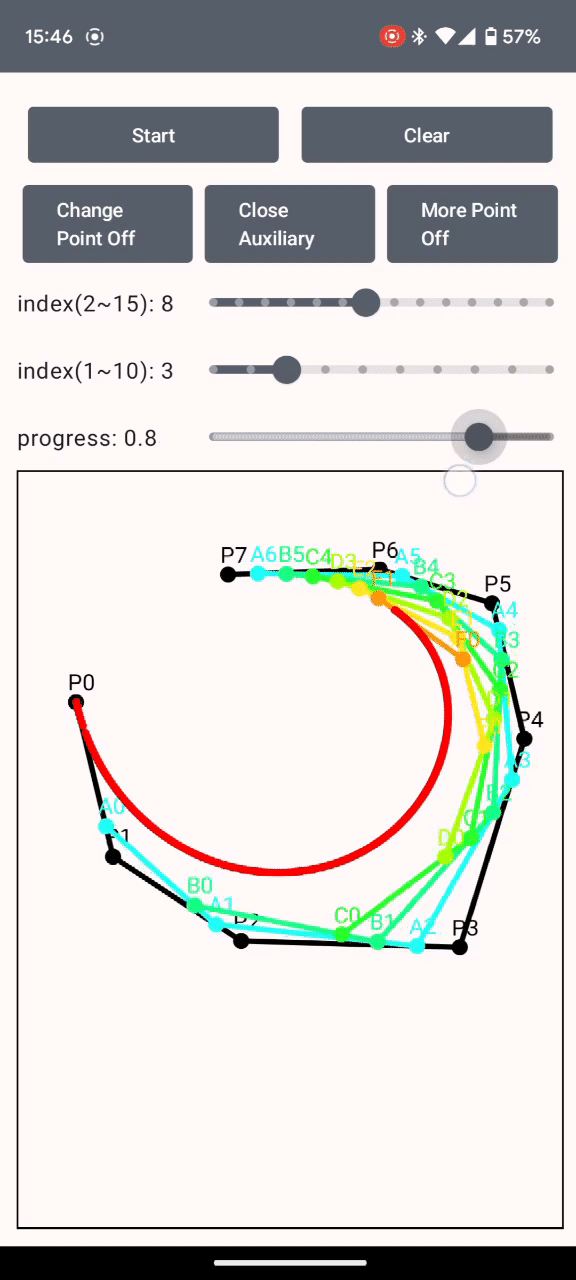
As shown in the figure, the ratio of AD to AB, BE to BC, and DF to DE are all the same. This ratio ranges from 0 to 1, and when the positions of point F are connected by a line, it forms the Bézier curve of the three points ABC.

The feeling of having completed it twice.
Although it has been five years, I still have a deep impression of this project(after all, it was difficult to find relevant information at that time).
This project used Kotlin Synthetic for data binding(although it’s now deprecated), and it was a surprise for me who had previously used findeViewById and @BindView. Yes, the biggest surprise for me when using Kotlin was Synthetic. I also found other aspects of its syntax to be useful. Now, I can utilize Compose to complete the layout of the page. The most noticeable result is the significant reduction in code volume. The first code(including XML) was around 800 lines, whereas the entire functionality can be completed in only around 450 lines of code.
In the process of using Compose, I have gained a deeper understanding of the “Compose is function” concept. Data is just data, and by bypassing data as a parameter to the Compose function, we can update the UI whenever the data changes. The beauty of this approach is that we no longer need to keep track of any additional UI objects or consider how certain elements should respond to specific actions. All we need to focus on is how a particular Compose function should display itself given certain parameters.
For example, when the “Change Point” button is clicked, it will change the contents of mInChange, which will affect many other elements. If we were to do this using View, we would need to listen for the “Change Point” button’s click event and modify all the affected elements in turn (which would require holding many other View objects in memory). However, with Compose, we still need to listen to the “Change Point” button’s click event, but for the corresponding listener action, we only need to modify the value of mInChange. The listener doesn’t need to do anything else or even be aware of what happens when this value is modified. Compose will handle the actual effects of this change(we can think of it like the parameters changing, which then re-invoke the function).
The usage of certain features is not very high, as the project is relatively small. Many of the features have not been fully utilized.
I am most happy about the fact that I was able to complete this same functionality in just half a day this time around, whereas it took me over a week to accomplish a similar task five years ago. I am unsure whether it is me or Kotlin that has undergone greater changes in these five years 😆.
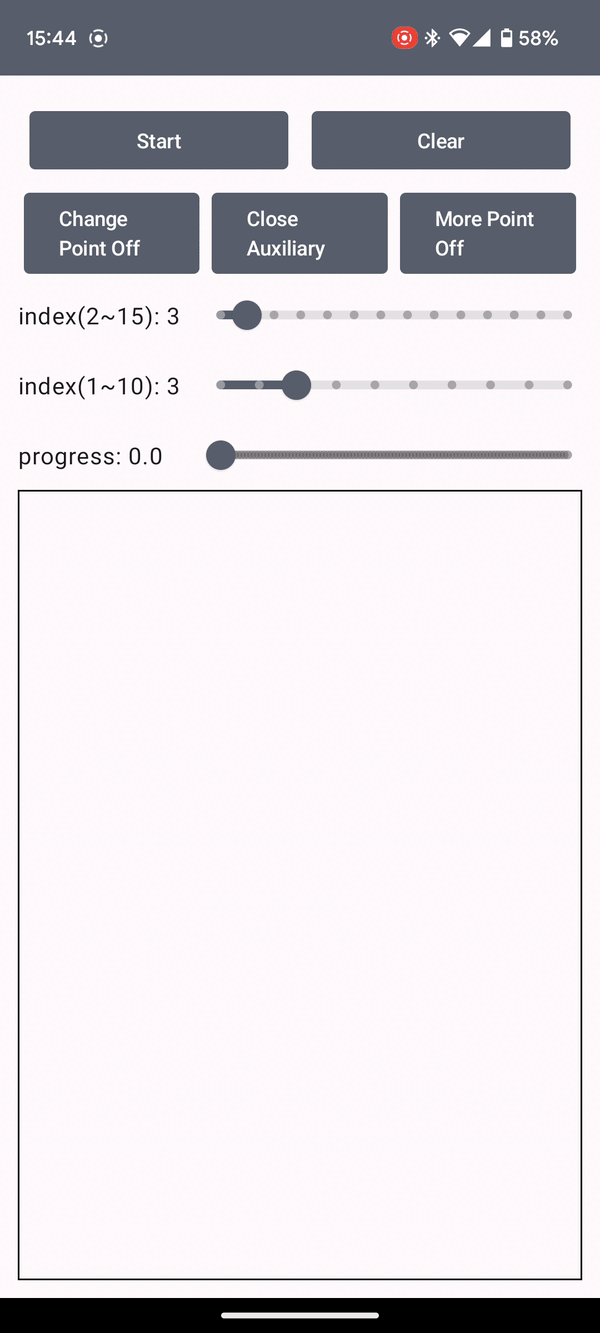
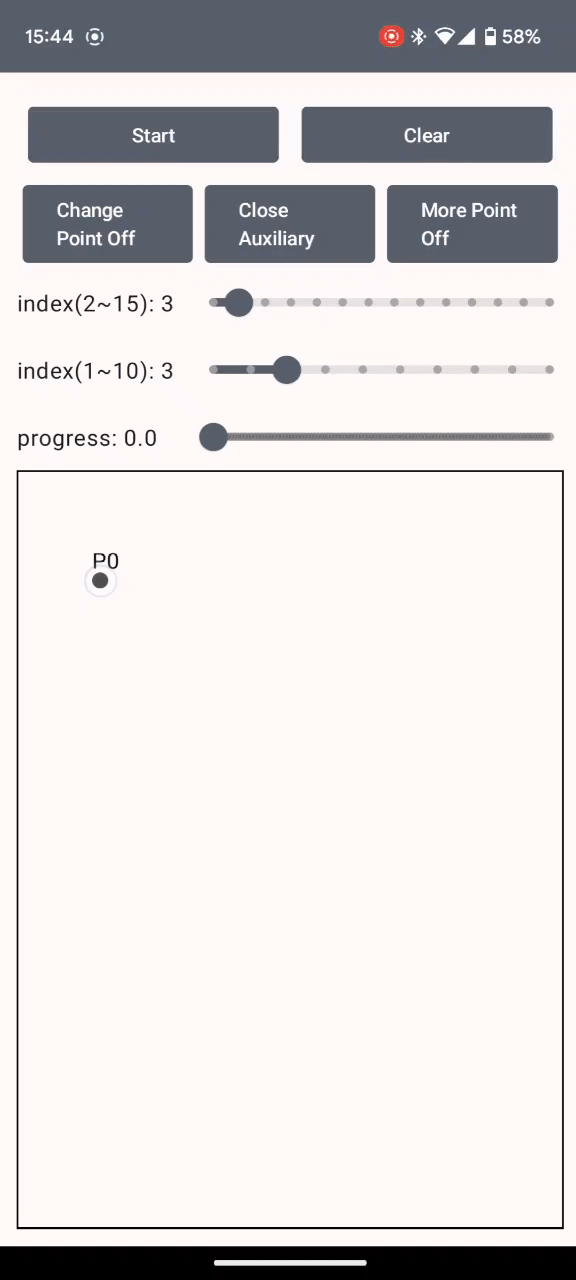
Bezier Curves Tools
Let’s take a look at the functionality of this tool. The main function is to draw Bezier curves (which can be of any degree), adjust key points, and manually adjust the draw progress. To maintain the authenticity of the drawing results, the final result point has not been optimized for display. As a result, there may be a discontinuity in cases where there are sudden large changes in position over a short period.
Compare Code
Since it’s the same functionality with different codes, comparing them with each other would be meaningful even if they were completed at different times. Of course, we should focus on the parts that are implemented similarly when making the comparison.
Screen touch event monitoring.
The main focus is on detecting the touch events that occur on the screen
First Code:
1 | override fun onTouchEvent(event: MotionEvent): Boolean { |
Second Code:
1 | Canvas( |
We can see that Compose provides detailed events for Tap and Drag, which results in fewer marked variables in the new code.
I was once amazed by this feature, which I thought was just syntax sugar.
For instance, here is a method that finds the closest valid point to the touch position.
First Code:
1 | private fun findNearlyPoint(touchX: Float, touchY: Float): Int { |
Secode Code:
1 | mBezierPoints.firstOrNull() { |
Similar to Java Stream, a chain structure looks more understandable.
Bezier curves drawing layer.
Bezier curves are mainly implemented using recursion.
First Code:
1 | private fun drawBezier(canvas: Canvas, per: Float, points: MutableList<Point>) { |
Second Code:
1 | { |
During the initial development phase, due to my limitations, the recursive method included both the drawing and calculation of the next level. However, during the secondary coding phase, influenced by the design of Compose, an attempt was made to transform all the point states into input information for the Canvas. This made the code-writing process more streamlined.
Of course, my development abilities have certainly changed in the past five years. Despite this, with the continous development of Kotlin, even for project accomplished using Kotlin, as new concepts are introduced and more suitable development technologises emerge, we still gain more from Kotlin and Compose.
My Story with Kotlin
My first encounter with Kotlin was in May of 2017. At that time, Kotlin was not yet the recommended language for Android development by Google. For me, Kotlin was more of a new technology that couldn’t be used practically in my work.
Nevertheless, I tried to use Kotlin to accomplish more tasks. Fortunately, without doing so, I wouldn’t have been able to finish this article and would have missed the chance to learn more about Kotlin in depth.
However, even when Google recommended Kotlin as the language for Android development in 2018, Kotlin still wasn’t a mainstream choice at the time. For me, some factors made me less inclined to use Kotlin at the time. Firstly, it was a new language, and the community was still under development. Many things still needed to be completed by the community, which resulted in various problems when using it in practice. There weren’t many feasible solutions for these problems online. Secondly, one of Kotlin’s features is its compatibility with Java, which is a double-edged sword. Although it allows me to use Kotlin with less burden (if I can’t do it in Kotlin, I could always use Java), it also led me to think that Kotlin is either Java++ or Java–. Thirdly, Kotlin didn’t bring any new content or special features. Anything Kotlin can do, Java can do as well (things like null values and data classes are more like syntactic sugar). So, why bother using an unfamiliar language to achieve what Java can already do?
Fortunately, more and more people are continually promoting and building Kotlin. This has attracted more people to join in. In recent years, Kotlin can be found in more and more projects. Adding Kotlin to existing projects is also becoming more widely accepted. I look forward to helping even more people with Kotlin.